Sunday 9 May 2010

Ninth Update

I really need to start updating this blog more regularly. Progress has been made since my last post.

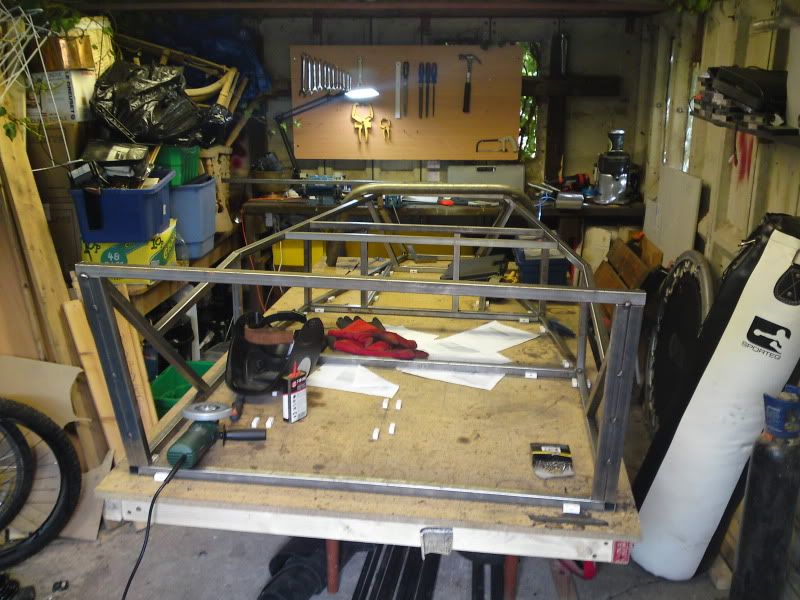
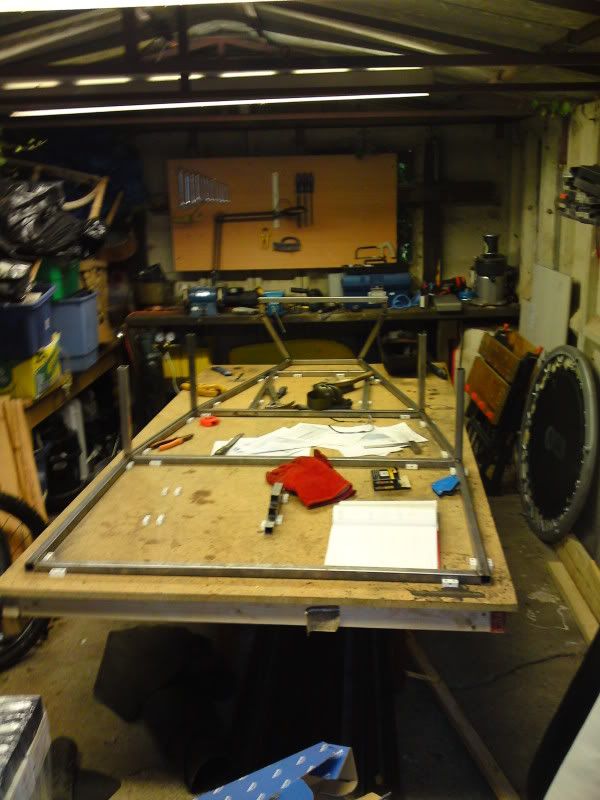
I've now finally finished the rear section of the chassis, it turned out to be a right pain to do because of the accuracy required and mistakes I'd made previously. I managed to place the diff cage in the wrong position, meaning that all of the tack welds had to be ground off so that I could put it in the right place. I had also miss off a piece for the roll bar supports and forgot to fully weld them, so they also needed to come off.

However that is all sorted now, and I've started the task of putting tacking the chassis plates in place. Only one side of the car is done so far as I can't get access to the other side, due to all of the stuff from my green house now being put there until the new green house is finished.

I have also solved my engine woes, as I got a tip off about a 1.8 Zetec engine being sold for £40 near by, after enquiring about it, I quickly got my mate and his fan to drive along and pick it up. It's only done 70,000 miles, and comes with a chopped down sump and fully painted. It is a known runner as the guy was going to be putting it into his MNR, but got hold of a 2.0 zetec engine instead. It is a 94 engine, meaning that it won't need a CAT fitting, i'll be going down the Megajolt and ZX9R bike carb route to get the engine running.

I've been told the engine should put out 150bhp, which should be interesting after going from a 60bhp Vauxhall Corsa.

Here are a couple of pictures showing the chassis before I started putting the chassis plates on, and the new shiny engine:


Tuesday 16 February 2010

Eighth Update

Well I discovered a problem last night. It turns out that the roll bar isn't tall enough for me. I am 6'6", and sit about 870mm from the ground to the top of my head. The roll bar sits about 960mm from the ground to the top, however there is still the 25mm bottom rails, seat support rails, seat runners, seat and helmet to take into consideration, meaning that if i were to roll, bearing in mind the harness won't keep me 100% secure in the seat, then it means my head will most likely hit the ground. Which is not something I want to happen.

So i have now decided to sell the roll bar and get a full roll cage fitted. I have had a few quotes from companies, saying it will cost around £450-£500 for a full custom cage installed, which to me isn't a bad price, for that extra piece of mind and extra safety as the car will now have side impact support.

This morning I went out and made some progress on the back end, the bottom body work supporting rail is now in place, so it allows me to see the size of car, which is surprisingly small.

Later on in the week I hope to finish the back end. I am going down to Cleveland tomorrow to visit Saturn Sports Cars, drop off some stuff as well as pick up the remainder of the chassis plates I needed, but couldn't make without spending more money, time and effort.

Monday 15 February 2010

Seventh Update


Just a quick update for the weekend. I managed to get hold of a camera to take a couple of pictures of my progress over the weekend. I managed to tack the roll bar support plates on and get the roll bar sorted out:


Since this picture was taken I have cut a 50mm hole in the middle of each roll bar mounting plates, meaning that the roll bar can now be recessed into these and welded on both sides of the place, giving it extra strength in case the worst happens.

I also took a little trip to pick up all of the bits I purchased. These bits included an engine stand which I have been wanting for ages.

Sunday 7 February 2010

Sixth Update

Sorry for the lack of posts on the blog, but I haven't had a camera since the start of November, so I haven't been able to take pictures of my build, hopefully I'll have sorted that out by the start of next month.

So far I have finished the main part of the chassis, I have the tubes for the rear bodywork bent, I have nearly completed all of the chassis plates. I have all of the suspension brackets needed, they just need to be tacked and welded into place.

I had to buy myself a pillar drill in order to put the holes in the chassis plates, a hand held drill just wasn't up to the job and I kept breaking drill bits. The drill only cost me £40 and is a floor standing SIP F16-16, which would cost £225 if you bought one new, all it needed was a new chuck which cost me £18, so a bargain if you ask me.

I recently managed to buy a fair few parts for the Roadster from someone who has decided to sell his build. I managed to pick up the following for the grand total of £143, saving me at least £50:

Steering Rack Aluminium Brackets
3ge Steering Rack Extensions
Sierra Track Rod Ends
3ge Mushrooms
Bottom Ball Joint
Transit Drag Links
Coil Pack
Diff Bracket
Clarke Engine Stand

So this means I will only need to buy the bits to make the wishbones and uprights, as well as the poly-bushes and crush tubes, steering column and some new wheel studs, which will be around the £300 mark for everything and then I'll have a fully rolling chassis.

Then once that has been completed I'll be starting work on rebuilding my 1.8 CVH engine, a job I have been looking forward to for ages!

I'll try and update this blog more regularly from now on.

Saturday 31 October 2009

Fifth Update

It has been too long since i have last updated my blog. In the time since the last update i've managed to accomplish quite a lot:
  • The main part of the chassis including the transmission tunnel is now finished
  • I completely stripped down the engine and i have found that the engine had blown its head gasket, so it will need to be skimmed (i've been told that this will be around £20 to get done)
The engine is going to require a lot of time and effort to get l
ooking spick and span, including:
  • Clean up and paint
  • Replace the big end bearings
  • Fit a complete new gasket set
  • Replace piston rings
  • Get the head skimmed
  • Fit a new oil filter
  • Replace the thermostat
  • As well as other jobs
I reckon that this will cost me around £120 to do potentially up to £150. But i feel that it will be worth it, as if i decide to buy a new engine for £100 (this one was free) then i will still need to replace parts so it will end up costing me more than this engine.

Today i finished the trasmission tunnel and with the help of my Dad, we carried the chassis out of the garage to allow me to give the garage a quick tidy. I've now sorted out which donor parts i'll be taking the scrap man and which ones i'll be keeping. Then gave my bench a brush down and moved some other things around to give me a bit more space to work on the car.

An hour ago i was told that making the chassis plates for the car are quite a simple process, i was originally going to buy them all, which was going to cost £100. But the majority of the chassis plates can be made out of 40mm x 3mm mild steel flat bar, so i'll be ringing up my steel stockist and try and pick some up on monday morning, hopefully it should be in the range of £10 meaning the chassis plates will cost me about £30 in total, a 70% saving, not bad if you ask me.

It is all starting to come together now. I will try and keep this blog updated more regularly. Here are a few pictures which were taken over the past month (i've recently sold my phone, which was my primary camera so it may be a about a week before i can take some more pictures):


Sunday 4 October 2009

Fourth Update

It's been a while since my last update, but i've been quite busy since then, with both uni and building the car.

I've progressed quite well though. I managed to get the majority of my donor car parts for the grand total of £138 (including delivery). Andy very kindly picked up all of the parts and drove them up to mine in his van. So now i have the engine, gearbox, diff, propshaft,
driveshafts, brakes, front uprights and a lots of other stuff.

I did however notice and issue with the rear frame of my chassis, t
he top right hand corner was 10mm further back than the top left hand corner, meaning quite a few pieces were in the wrong place. It goes to show that just
because it looks right, doesnt m
ean it does, so 5 minutes with the grinder and a few more tack welds later, it
was all in the correct position.

Here are a couple more pictures to show you what i have done:


Sunday 27 September 2009

Third Update

I've been busy over the weekend. I've now got the basic shape of the chassis tack welded together. I ran into a couple of problems, e.g. 1 of the uprights was slightly too big and was forcing a bottom chassis rail upwards, so it was no longer flat on the board, i only noticed this after welding the top rail on (it required a bit of force to get it into the right position, this to me should have been an immediate alarm bell that something was wrong). It has now all been sorted and everything seems to be of the right dimension.

From now i'll be adding in extra members to strengthen the chassis, it will then be moved forward on the board by 750mm and the back from will be constructed from there. I have uploaded a couple of more pictures to show you what i have done so far.

Please ignore the roll bar resting on the front frame, i kept tripping over it so i put it on the table and forgot to put it back when i took the pic.